energeticpulse.com

10 Things You Should Know About Brazilian Blowout

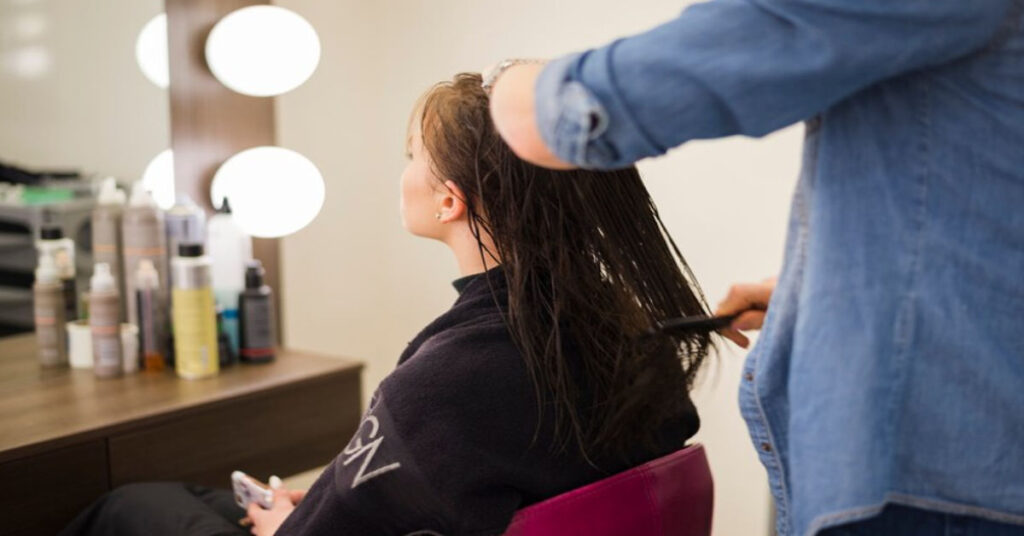
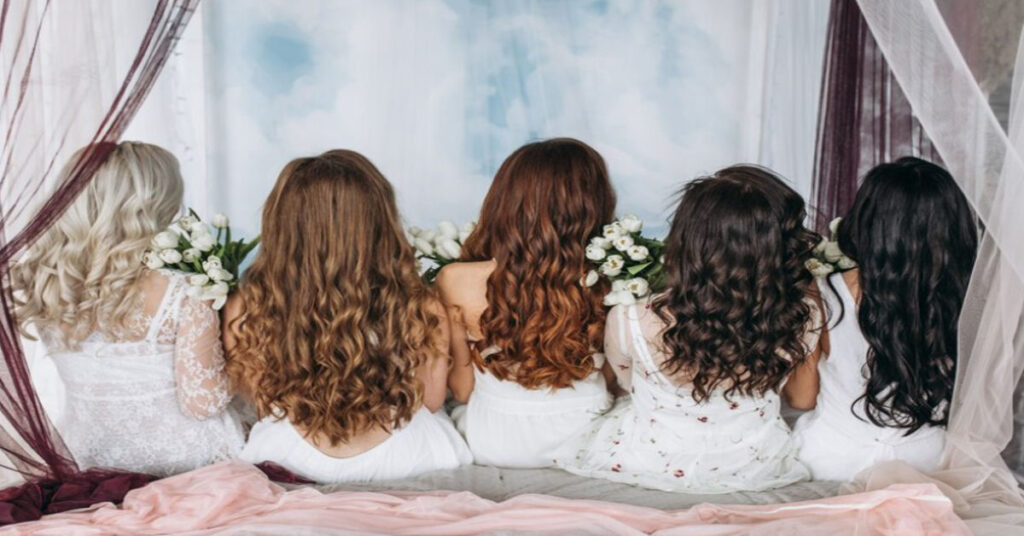
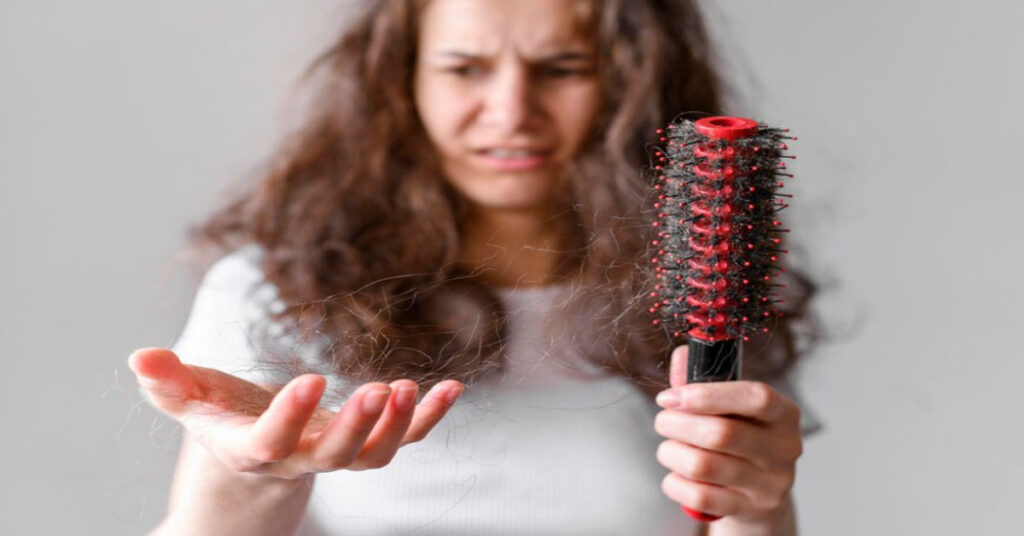
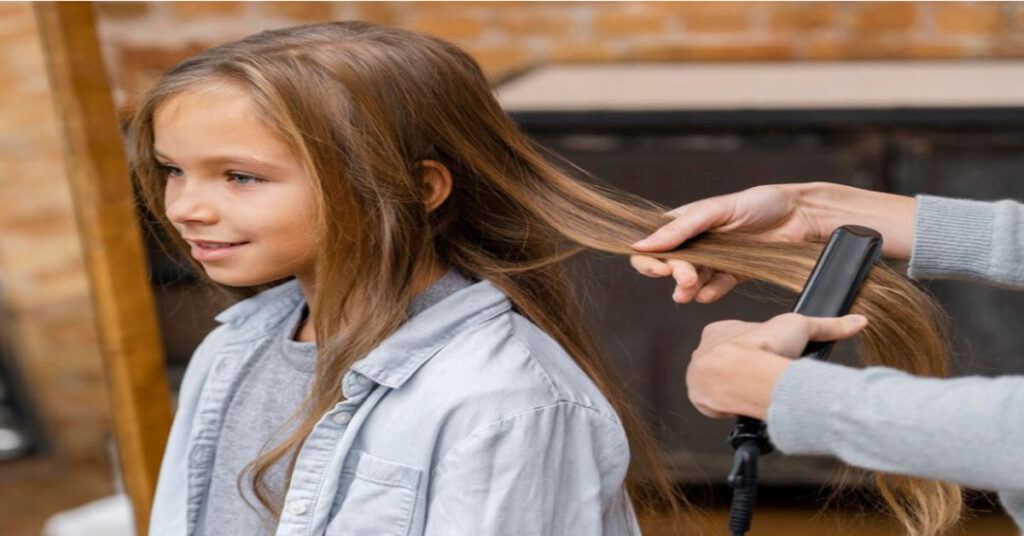
If you’ve ever wondered about taming frizzy hair, you’ve probably come across the Brazilian Blowout. It’s a hair treatment that promises smoother, shinier, and frizz-free hair. But before diving in, it’s essential to know the facts about this popular hair smoothing treatment. In this article, we’ll cover everything you need to know, from how it works to its potential impact on your hair’s health. What is a Brazilian Blowout? A Brazilian Blowout is a professional smoothing treatment that helps to eliminate frizz and enhance the shine of your hair. It works by coating each hair strand in a protective protein layer, which smooths the cuticles and shields the hair from external damage. The best part? It can be customized depending on your hair type, whether you want to keep your curls or go for a completely sleek look. 1. It’s a Time-Saver One of the biggest benefits of a Brazilian Blowout is that it dramatically reduces your styling time. If you spend hours blow-drying and straightening your hair, this treatment can cut that time in half. Your hair will be much easier to manage, which is a major plus for those who are always on the go. 2. How Long Does It Last? The effects of a Brazilian Blowout last anywhere from 10 to 12 weeks, depending on your hair type and how well you maintain it. Using sulfate-free shampoos and conditioners can help extend the life of the treatment. You’ll know it’s time for a touch-up when your hair starts to frizz again. 3. Is It Safe? Many people wonder if Brazilian Blowouts are safe. The truth is, while the treatment is generally safe, there are some concerns due to the formaldehyde used in the process. Formaldehyde helps to lock the smoothing effect into your hair, but it’s also a chemical known to cause irritation. It’s essential to consult with a trained professional to ensure your salon uses a safe level of formaldehyde. 4. Brazilian Blowout vs Keratin Treatment While both Brazilian Blowout and keratin treatments smooth the hair, they’re not the same. A Brazilian Blowout is often preferred because it doesn’t require the days of waiting after the treatment to wash your hair. You can wash your hair and style it immediately after the appointment. Keratin treatments, on the other hand, may require you to wait a few days before washing. 5. It Works on All Hair Types A Brazilian Blowout isn’t just for straight or wavy hair. It can be customized for all hair types, from fine to curly, or even thick and coiled. Whether you want to keep your natural curls or go pin-straight, the treatment can be tailored to suit your desired look. 6. It’s Temporary, Not Permanent A Brazilian Blowout doesn’t permanently change your hair structure. The treatment wears off gradually, and your natural texture will return over time. This makes it a great option for people who want smoother hair but are not ready for a permanent change. 7. Can Be Expensive One thing to keep in mind is that a Brazilian Blowout can be quite costly. Prices range from $200 to $500 depending on the salon and your hair length. Plus, there’s the added expense of using special hair care products to maintain the treatment. 8. How the Process Works The process of getting a Brazilian Blowout usually takes 90 minutes to two hours. First, your hair is washed to remove any buildup. Then, the stylist applies the smoothing solution, which is followed by blow-drying and flat ironing the hair to seal the product in. Finally, your hair is rinsed, dried again, and styled. You’ll leave the salon with sleek, frizz-free hair! 9. Maintenance Tips To keep your Brazilian Blowout lasting as long as possible, you should follow a few maintenance tips: Use a sulfate-free shampoo and conditioner. Avoid saltwater or chlorine as much as possible (or wear a swim cap). Keep heat styling to a minimum, as it can shorten the treatment’s life. 10. You Can Still Color Your Hair Many wonder if they can color their hair after a Brazilian Blowout. The good news is yes! It’s safe to color your hair after the treatment, but you should wait at least two weeks to ensure the treatment is fully set. Is It Worth It? At the end of the day, whether or not a Brazilian Blowout is worth it depends on your hair goals. If you want frizz-free, smoother, shinier hair with less time spent styling, this could be the treatment for you. However, always make sure you’re getting it done by a certified professional to ensure the best results.

10 Things You Should Know About Brazilian Blowout Read More »

How Long Does a Keratin Smoothening Treatment Last

How Long Does a Keratin Smoothening Treatment Last

How Long Does a Keratin Smoothening Treatment Last Keratin smoothening treatments are a game-changer for those seeking sleek, shiny, and frizz-free hair. If you’re tired of battling frizz, humidity, and unruly waves, this treatment can be the perfect solution. But how long does a keratin smoothening treatment last? Let’s dive into the details of how this treatment works and what you can expect in terms of longevity. What is a Keratin Smoothening Treatment? Before we discuss the treatment’s longevity, it’s essential to understand what it is. Keratin smoothening treatment involves applying a keratin-based solution to your hair, followed by flat ironing to seal the formula into your strands. Keratin is a natural protein found in hair, skin, and nails. When applied to the hair, it strengthens the hair shaft, making it smoother and more manageable. How Long Does a Keratin Smoothening Treatment Last? One of the first questions people ask before booking their appointment is, “How long will my keratin treatment last?” Generally, the results of a keratin smoothening treatment last anywhere from three to six months. However, this depends on several factors, including your hair type, aftercare routine, and the product used during the treatment. Hair Type Matters The longevity of your treatment largely depends on your hair type. If you have fine, straight hair, you might find that the results last closer to six months. On the other hand, if you have coarse or curly hair, you may notice that the treatment fades quicker, typically around three to four months. Aftercare: Key to Longer-Lasting Results How you care for your hair post-treatment is critical to maximizing the longevity of your keratin treatment. Here are some tips to help extend the life of your smooth locks: 1. Use Sulfate-Free Shampoo and Conditioner Sulfates are harsh detergents that can strip your hair of its natural oils and keratin. To ensure your treatment lasts as long as possible, invest in a sulfate-free shampoo and conditioner. This will help maintain the smoothness and shine for an extended period. 2. Wash Your Hair Less Frequently The more you wash your hair, the faster the keratin will wear off. Try to limit hair washing to two or three times a week. When you do wash, be gentle and avoid hot water, as it can cause the keratin to break down faster. 3. Avoid Heat Styling Tools Although the treatment helps protect your hair from damage, excessive use of heat styling tools like flat irons and curling wands can cause the treatment to fade faster. Stick to air drying or use heat tools sparingly to prolong the results. 4. Don’t Swim in Chlorine or Salt Water Chlorine and saltwater are enemies of keratin-treated hair. They can strip away the treatment, causing it to fade more quickly. If you plan to go swimming, make sure to wear a swim cap or avoid getting your hair wet. When Should You Get a Touch-Up? You might wonder when it’s time to go for another treatment. Typically, once you notice your hair becoming frizzier or harder to manage, it’s a sign that the keratin treatment is wearing off. This can happen anytime between three to six months after your initial treatment. However, it’s recommended not to get the treatment too frequently, as overprocessing can lead to hair damage. How Much Does a Keratin Smoothening Treatment Cost? Now that you know how long the results last, let’s talk about the cost. Keratin smoothening treatments range from $150 to $450, depending on your location, the salon, and your hair length. While the upfront cost might seem high, many people find it worth the investment for the time saved in daily styling and the overall appearance of healthier, shinier hair. Are There Different Types of Keratin Treatments? Yes, not all keratin treatments are created equal. Here are some common types of keratin treatments available: 1. Brazilian Blowout The Brazilian Blowout is a popular type of keratin treatment that leaves hair smoother and straighter. It typically lasts about three months and allows for some flexibility in how straight or wavy you want your hair to be. 2. Soft Keratin Treatment This is a milder version of a keratin treatment, making it ideal for those who want to smooth their hair without completely straightening it. The results are softer, more natural, and last around two to three months. 3. Express Keratin Treatment For those short on time, an express keratin treatment offers quicker application and processing times. However, the results typically last only four to six weeks, making it a temporary fix for smoother hair. Is a Keratin Treatment Right for You? Now that you know how long a keratin smoothening treatment lasts, you may be wondering if it’s right for you. Here are a few questions to ask yourself before deciding: Do you want to reduce frizz and make your hair more manageable? Are you willing to invest time and money in aftercare products and routines? Do you prefer a semi-permanent solution rather than committing to daily heat styling? If you answered “yes” to these questions, then a keratin treatment might be the perfect choice for you! Conclusion In summary, keratin smoothening treatments offer a fantastic solution for taming frizz and achieving silky, shiny hair. On average, you can expect the results to last three to six months, depending on your hair type and how well you care for it afterward. Investing in the right products, such as sulfate-free shampoo and conditioner, and avoiding excessive washing or heat styling can help you extend the lifespan of your treatment. So, if you’re ready to embrace smooth, manageable hair for months at a time, booking a keratin smoothening treatment could be the next best step in your haircare routine. FAQs 1. Can I color my hair after a keratin treatment? Yes, you can color your hair, but it’s best to wait at least two weeks after your keratin treatment to allow the formula to fully settle in. 2. Is keratin treatment safe for all

How Long Does a Keratin Smoothening Treatment Last Read More »

Different Types of Hair Extensions

Find Your Perfect Match: Exploring Types of Hair Extensions

Different Types of Hair Extensions Hair extensions have taken the beauty world by storm, offering anyone the chance to transform their hair length, volume, and style in just a matter of hours. Whether you’re looking for long, flowing locks or just a little extra volume, hair extensions are your go-to solution. But with so many options out there, which one should you choose? In this guide, we’ll walk through the different types of hair extensions, how they work, and the pros and cons of each. By the end, you’ll have all the information you need to pick the perfect extensions for your style. What Are Hair Extensions? Hair extensions are strands of natural or synthetic hair that are attached to your real hair. They add length, volume, and sometimes color. You can wear them for a day or several months, depending on the type and how well you care for them. Types of Hair Extensions 1. Clip-In Hair Extensions Clip-in hair extensions are the most popular type due to their ease of use. These come as individual wefts of hair that you simply clip into your hair at the roots. Pros: Easy to apply and remove at home No damage to natural hair Great for occasional use Cons: Can feel heavy if worn for long periods May not blend seamlessly if not installed correctly 2. Tape-In Hair Extensions Tape-in hair extensions are another semi-permanent option. These extensions come with a strip of tape at the top, which is applied to your hair using a heating tool. They typically last around 6-8 weeks before needing to be replaced. Pros: More natural-looking than clip-ins Lasts longer than temporary options Lightweight and comfortable Cons: Requires professional application Can damage natural hair if not cared for properly 3. Sew-In (Weave) Hair Extensions For sew-in extensions, your natural hair is braided into tight cornrows, and the extensions are sewn into the braids using a needle and thread. This is a popular choice for those with thick, coarse hair. Pros: Long-lasting and secure Perfect for adding volume and length to thicker hair types Cons: Can be painful and put tension on the scalp Requires professional application Regular maintenance is needed to avoid damage 4. Micro-Link Hair Extensions Micro-link extensions (also called micro-beads or micro-loop extensions) are applied strand-by-strand. Tiny metal beads are used to attach the extension to small sections of your natural hair. Pros: No glue or heat involved Hair moves more naturally Cons: Can cause breakage if beads are too tight Requires professional installation Permanent vs. Temporary Hair Extensions Now that we’ve covered some popular types of hair extensions, it’s important to understand the difference between permanent and temporary options. Temporary Extensions If you’re looking to switch up your hairstyle for a day or night out, temporary extensions are perfect. Clip-ins and halo extensions are popular options, allowing you to add length and volume instantly without the need for professional help. Temporary extensions are: Easy to install and remove on your own Great for anyone who wants to switch up their look occasionally Cost-effective compared to permanent options Permanent Extensions Permanent extensions, like tape-ins, sew-ins, and micro-link extensions, are ideal for long-term wear. These are professionally applied and can last from several weeks to months, depending on the type and how well you maintain them. Choosing Between Synthetic and Human Hair Extensions When selecting hair extensions, you’ll also need to choose between human hair extensions and synthetic hair extensions. Both have their advantages, but understanding the difference will help you make the right choice for your needs. Human Hair Extensions Human hair extensions are made from real, natural hair, which makes them look and feel more realistic. They can be styled with heat tools, dyed, and treated just like your own hair. Pros: Look and feel natural Can be dyed and styled Long-lasting if cared for properly Cons: More expensive than synthetic options Requires more maintenance Synthetic Hair Extensions Synthetic hair extensions are made from man-made fibers designed to mimic real hair. They’re usually more affordable than human hair extensions but come with limitations, especially in terms of styling. Pros: Affordable Available in a variety of styles and colors Cons: Cannot be styled with heat tools Shorter lifespan compared to human hair   How to Care for Hair Extensions Caring for hair extensions is crucial to ensuring they last as long as possible. Here are some tips to keep them looking their best: Brush Regularly: Gently brush your extensions using a soft-bristle brush to avoid tangling. Wash Sparingly: Wash your extensions as needed with sulfate-free shampoo to avoid drying them out. Avoid Heat: If you’re wearing synthetic hair extensions, avoid using heat tools like curling irons or straighteners. Sleep with Care: If you’re wearing permanent extensions, tie your hair into a loose braid before bed to prevent tangling.   Conclusion Hair extensions are a fantastic way to change up your look, whether you’re after a temporary change for a night out or a more permanent style boost. From clip-ins to tape-ins, each type of extension has its own pros and cons, and the best choice depends on your hair type, lifestyle, and the look you’re going for. By understanding the different types of hair extensions, how they work, and what maintenance they require, you’ll be able to make an informed decision that leaves you with the hair of your dreams! Whether you go for clip-ins, tape-ins, or sew-ins, the most important thing is to feel confident and beautiful with your new hair.  

Find Your Perfect Match: Exploring Types of Hair Extensions Read More »

Is it noarmal to lose hair at 25

Can Hair Extensions Really Cause Hair Loss? Discover the Truth!

Can Hair Extensions Cause Hair Loss? Hair extensions are a popular choice for many people seeking to enhance their hairstyles, add volume, or try out a new look. However, there’s an ongoing debate about whether these beauty accessories can lead to hair loss. In this article, we will explore the relationship between hair extensions and hair loss, examining the potential risks and benefits, and offering guidance on how to use them safely. Understanding Hair Extensions What Are Hair Extensions? Hair extensions are strands of human or synthetic hair that are attached to your natural hair to increase its length and volume. They come in various forms, including clip-ins, tape-ins, micro-link, and sew-in wefts. Each type has its unique application method, which can influence the health of your natural hair. Popular Types of Hair Extensions Clip-in Extensions: Easy to apply and remove, these are great for temporary use. Tape-in Extensions: These require a professional for application but offer a seamless look. Micro-Link Extensions: These are attached using tiny beads and can last for several months. Sew-in Extensions: Also known as weaves, these are sewn into braids of your natural hair and can be quite heavy. Can Hair Extensions Cause Hair Loss? The Connection Between Hair Extensions and Hair Loss The short answer is yes; hair extensions can lead to hair loss if not applied or maintained correctly. The key factors contributing to this issue include: Weight and Tension: Heavy extensions can pull on your natural hair, leading to traction alopecia, a type of hair loss caused by consistent pulling. Improper Application: If extensions are applied too tightly or incorrectly, they can cause damage to the hair follicles, resulting in breakage or hair loss. Poor Maintenance: Neglecting to care for extensions properly can lead to tangling and breakage, which might worsen hair loss. Types of Hair Loss Associated with Hair Extensions Traction Alopecia: This occurs due to constant tension on the hair follicles. The areas where the extensions are applied may thin out over time. Breakage: Extensions can cause your natural hair to become weak and brittle, leading to breakage, particularly if they’re not removed correctly. Allergic Reactions: Some individuals may have allergic reactions to the adhesives used in tape-in extensions, leading to scalp irritation and potential hair loss. Preventing Hair Loss When Using Hair Extensions Choose the Right Type of Extensions Selecting the right type of hair extensions is crucial in minimizing the risk of hair loss. Here are some tips: Lightweight Options: Opt for lighter extensions that won’t add too much weight to your natural hair. Quality Products: Invest in high-quality extensions made from natural hair to reduce the risk of damage. Consult a Professional Always consult with a professional stylist who has experience in applying hair extensions. They can: Assess your hair type. Recommend the best application method. Ensure that the extensions are not applied too tightly. Follow a Proper Maintenance Routine Maintaining your extensions is essential for preventing hair loss. Here are some practices to keep in mind: Gentle Cleansing: Use sulfate-free shampoos and conditioners to keep your hair clean without stripping it of moisture. Regular Brushing: Use a wide-tooth comb or a special brush designed for extensions to prevent tangling. Limit Heat Styling: Excessive heat can weaken both your natural hair and extensions. If you must use heat, apply a heat protectant first. Take Breaks Between Applications If you frequently wear hair extensions, consider taking breaks between applications to allow your natural hair to recover. This rest period can help prevent damage and promote hair health. Signs of Hair Loss from Extensions If you’re concerned about potential hair loss due to hair extensions, watch for these signs: Thinning Hair: Noticeable thinning in areas where extensions are applied. Excessive Shedding: If you notice more hair than usual falling out during washing or styling. Scalp Irritation: Redness, itching, or flaking of the scalp can be a sign of an allergic reaction or irritation from extensions. Conclusion In conclusion, while hair extensions can enhance your look, they do come with the risk of hair loss if not handled with care. Understanding the different types of extensions, choosing the right method, and maintaining proper care can help minimize these risks. By taking these precautions, you can enjoy the beauty and versatility of hair extensions without compromising your natural hair health. Always remember that your hair deserves the best care possible, and prioritizing its health will ensure you can wear extensions confidently and stylishly! Additional Tips for Healthy Hair Hydration: Drink plenty of water and eat a balanced diet rich in vitamins and minerals to support hair growth. Scalp Care: Keep your scalp healthy by massaging it regularly and using oils that promote hair health. By following these guidelines, you can enjoy your hair extensions while keeping your natural hair strong and beautiful!  

Can Hair Extensions Really Cause Hair Loss? Discover the Truth! Read More »

cutting or color

Does Cutting or Coloring Hair Come First

When it comes to hair care, one of the most debated topics is whether to cut or color hair first. This question often perplexes many individuals preparing for a new look. Understanding the best approach can save time, money, and potentially disappointment. So, let’s delve into this topic and clarify the best practices when it comes to hair cutting and coloring. Why This Question Matters The order in which you cut or color your hair can significantly impact the final result. Each method has its benefits and can affect how your hair behaves. Choosing the right sequence can help you achieve the desired look while maintaining the health of your hair. The Basics: Understanding Hair Cutting and Coloring Hair Cutting Hair cutting involves trimming or styling your hair to create a specific shape or length. It can help remove split ends, add layers, or create a completely new style. The goal is often to enhance the overall appearance and manageability of your hair. Hair Coloring Hair coloring, on the other hand, is all about changing the hue of your hair. Whether you want to cover greys, refresh your color, or go for a dramatic change, the process involves applying dye to your hair. The Debate: Cut First or Color First? Pros of Cutting Hair Before Coloring Precision in Color Application Cutting your hair before coloring allows for a more precise color application. When your hair is freshly cut, it’s easier for the stylist to see how the color will look on your new style. Healthier Ends Trimming the ends before coloring can prevent damage. If you color hair with split ends, the dye can exacerbate the problem, leading to more damage. Less Color Overlap If you color first and then cut, you may risk having uneven color. This is especially true if you opt for a dramatic cut. Cons of Cutting Hair Before Coloring Potential for Over-processing If you cut your hair and then apply color, your stylist might need to use a stronger formula to get the desired shade, especially if your hair is already fine or damaged. Less Color Accuracy Cutting hair can change how you envision the final color. You might prefer a different shade after seeing how your new cut frames your face. Pros of Coloring Hair Before Cutting Experimentation Coloring first allows you to experiment with colors without committing to a cut. This way, you can see how the color complements your current style before making a change. Reduced Hair Damage If your primary concern is to refresh your color, coloring first can sometimes be less damaging than cutting, especially if you’re using a semi-permanent dye. Fuller Look When hair is longer, it can look fuller, making colors appear more vibrant and less washed out. Cons of Coloring Hair Before Cutting Risk of Inaccuracy If you color first and then cut, you might end up with uneven color distribution if your stylist is not careful. This is particularly crucial for highlights or balayage techniques. Split Ends If your ends are damaged, coloring may exacerbate this issue, making it more visible after a fresh cut. Summary Cutting First: Best for precision, health, and reduced damage. Coloring First: Ideal for experimentation and maintaining fullness, but can increase damage risks. What Do the Professionals Say? Stylist Recommendations Most professional stylists recommend cutting hair first, particularly for those with long hair. This approach ensures that the color is applied to healthy, freshly cut strands. Moreover, it reduces the risk of damage and provides a clearer view of how the new style will look. Client Preferences However, preferences can vary among clients. Some prefer to color first, especially if they are considering a significant change. It’s essential to communicate your desired outcome with your stylist to determine the best course of action for you. Conclusion: Finding Your Balance Ultimately, the decision of whether to cut or color hair first depends on personal preference and hair type. Each method has its pros and cons. If you prioritize precision and health, consider cutting your hair before coloring. If you want to experiment with color and maintain a fuller look, coloring before cutting may be the way to go. Final Thoughts Always consult with a professional stylist to get tailored advice based on your hair type and desired outcome. They can help you achieve the best results while ensuring the health of your hair remains intact.  

Does Cutting or Coloring Hair Come First Read More »

levels-of-bleached-hair-from-dark-to-light

Levels of Bleached Hair: From Dark to Light

A Guide to Bleached Hair Levels: Transitioning from Dark to Light Bleaching your hair is an exciting way to change up your look, but it’s essential to understand the different levels of bleached hair. These levels range from dark shades to stunning light tones, each with its unique appeal. If you’re ready to transform your hair color, you might also want to check out places to buy Fortnite accounts for your gaming adventures. Understanding Hair Levels What Are Hair Levels? Hair levels refer to the scale used to describe the darkness or lightness of your hair. This scale typically ranges from 1 (black) to 10 (lightest blonde). Knowing your hair level is crucial before bleaching, as it helps you achieve the desired result while minimizing damage. The Levels Explained Level 1: Black The darkest shade, often rich and deep in color. Level 2: Dark Brown A shade that still maintains a rich depth but begins to show a hint of warmth. Level 3: Medium Brown This level starts introducing lighter hues, making it a versatile option for many styles. Level 4: Light Brown A softer tone that is still brown but significantly lighter and closer to blonde. Level 5: Dark Blonde A beautiful blend of brown and blonde, perfect for subtle highlights. Level 6: Medium Blonde Bright and vibrant, this level offers a sunny disposition. Level 7: Light Blonde This color shines and can often be seen on beachy, sun-kissed looks. Level 8: Very Light Blonde Almost platinum, this shade is daring and bold. Level 9: Platinum Blonde The lightest shade, often desired for its striking beauty and edge. Transitioning Between Levels Transitioning between levels of bleached hair requires careful planning and patience. Here’s a deeper look at how to approach this process effectively: Gradual Change is Key Jumping too many levels in one session can cause significant damage to your hair. Hair can only handle a certain amount of lifting (lightening) at a time, and this varies from person to person based on hair type, texture, and condition. A general rule of thumb is to transition by one or two levels at a time. For example, if you have dark brown hair (Level 3) and want to achieve a light blonde (Level 7), it’s better to first go to a medium brown (Level 4) or dark blonde (Level 5) before attempting to reach that light blonde shade. This method not only minimizes damage but also allows you to assess how your hair reacts to the bleaching process. Consultation with a Professional Working with a professional colorist is highly recommended for this kind of transformation. They can evaluate your hair’s current condition and determine the best plan for lifting your color. A colorist will also select the right products and techniques to use, ensuring your hair stays healthy throughout the process. Monitor Your Hair’s Health Before each bleaching session, assess your hair’s health. If your hair feels dry or brittle, it may need some time to recover. Incorporate deep conditioning treatments and avoid heat styling for a few weeks before your next bleaching appointment. This will help strengthen your hair and prepare it for the upcoming changes. Use High-Quality Products When transitioning between levels, it’s essential to use high-quality bleaching products and aftercare. Opt for professional-grade bleach and developers, and follow up with a color-safe, sulfate-free shampoo and conditioner. These products can help maintain the vibrancy of your new color while keeping your hair hydrated. Be Ready for Maintenance Lighter hair requires more upkeep than darker shades. You may need to schedule regular touch-ups every 6 to 8 weeks to maintain the desired level and prevent unwanted brassiness. Additionally, using purple shampoos can help tone down any yellow or orange undertones that may develop over time.   Care Tips for Bleached Hair Taking care of bleached hair is crucial to maintaining its health, vibrancy, and overall appearance. Here are some essential tips to keep your bleached locks looking their best: 1. Use Sulfate-Free Shampoo and Conditioner Sulfates are harsh detergents found in many shampoos that can strip away natural oils and color. Opt for sulfate-free products specifically designed for color-treated hair. These formulas are gentler and help maintain your hair’s moisture balance, ensuring that your bleached hair stays hydrated and vibrant. 2. Deep Conditioning Treatments Bleached hair can become dry and brittle due to the chemical process. Incorporating deep conditioning treatments into your routine is vital. Aim for a deep conditioning mask or treatment at least once a week to restore moisture and nourishment. Look for products containing ingredients like argan oil, keratin, or shea butter, which can help repair damage and add shine. 3. Avoid Heat Styling Heat styling tools like blow dryers, straighteners, and curling irons can exacerbate dryness and damage in bleached hair. Whenever possible, let your hair air dry and embrace your natural texture. If you must use heat styling tools, always apply a heat protectant spray beforehand to minimize damage. 4. Regular Trims Regular trims are essential for maintaining the health of bleached hair. Split ends can travel up the hair shaft, leading to more significant damage. Aim to get a trim every 6 to 8 weeks to keep your ends healthy and prevent breakage. 5. Protect from Sun Exposure UV rays can fade your hair color and cause further damage to bleached strands. When spending time outdoors, consider wearing a hat or using hair products with UV protection. This simple step can help shield your hair from sun exposure and keep your color looking fresh. 6. Avoid Swimming in Chlorine Chlorine from pools can wreak havoc on bleached hair, leading to dryness and discoloration. If you plan to swim, wet your hair with fresh water beforehand and apply a leave-in conditioner to create a protective barrier. After swimming, wash your hair thoroughly with a clarifying shampoo to remove any chlorine residue. 7. Use Purple Shampoo Bleached hair, especially blonde shades, is prone to developing brassy or yellow tones over time. Using a purple

Levels of Bleached Hair: From Dark to Light Read More »

Where Do Maggots Come From

Where Do Maggots Come From

Introduction Have you ever looked at a rotting piece of fruit or spoiled meat and noticed small, white, worm-like creatures wriggling around? These tiny creatures are maggots, and they have a surprising origin. Understanding where maggots come from can help you avoid them and learn a bit more about nature’s unique recycling process. What Are Maggots? Maggots are larvae of flies, particularly those of the housefly (Musca domestica) or blowfly (Calliphoridae). When a fly lays eggs on a food source, the eggs quickly hatch, producing maggots. They’re soft-bodied, legless, and often mistaken for worms. However, unlike worms, maggots are part of a larger life cycle of flies. The Maggot Life Cycle To truly understand where maggots come from, it helps to know their life cycle. Here’s a quick breakdown: Egg: Flies lay eggs on a suitable food source, typically organic material. This could be decomposing meat, fruits, or even garbage. Larva: Within 8 to 20 hours, the eggs hatch into maggots. These maggots feed on their immediate environment, absorbing nutrients as they grow. Pupa: After a few days, the maggot transitions into the pupal stage, where it develops a protective shell. This is where it starts to transform into a fly. Adult Fly: Finally, the pupa cracks open, releasing a fully grown fly ready to continue the cycle. Where Do Maggots Come From? Maggots come from the eggs of flies. Flies seek out rotting or decomposing matter as a perfect location for laying their eggs. Common places where maggots might appear include: Garbage bins: Flies lay eggs in trash, especially if food waste is present. Animal carcasses: Decaying meat provides a nutritious environment for maggots to thrive. Rotting food: Maggots often appear on spoiled fruits, vegetables, and meat left out too long. How Do Flies Lay Eggs? Flies are incredibly fast at locating food. Their keen sense of smell leads them to rotting organic material within minutes. Once they find a suitable spot, they lay tiny white eggs in clusters. One fly can lay up to 500 eggs in a matter of days, which means a maggot infestation can occur quickly. Why Do Maggots Appear So Quickly? One of the reasons maggots appear so fast is due to their rapid development. As soon as the eggs are laid, the maggots can hatch within hours. Warm temperatures accelerate this process, which is why you may notice maggots more often in the summer. The Role of Maggots in Nature While maggots may seem like unwelcome pests, they play an essential role in the ecosystem. Maggots break down organic material, speeding up the process of decomposition. This helps recycle nutrients back into the soil, supporting plant growth and maintaining the cycle of life. Are Maggots Dangerous? Maggots themselves aren’t necessarily dangerous, but their presence indicates unsanitary conditions. Since they are attracted to decaying matter, they can carry bacteria and pathogens. If maggots appear in your home, it’s a sign that something is rotting or has been left out too long, potentially leading to health risks. How to Prevent Maggots To avoid maggot infestations, follow these steps: Dispose of food waste promptly: Don’t let food sit out. Seal it in bags and take it out to the garbage regularly. Clean your garbage bins: Regularly wash out your bins with hot, soapy water to remove residues that attract flies. Use tight-sealing containers: Store food waste in containers with tight lids until you’re ready to dispose of it. Cover food outdoors: When eating outside, cover food to prevent flies from landing on it. Natural Remedies to Get Rid of Maggots If you discover maggots, here are a few natural remedies to eliminate them: Boiling water: Pour boiling water over the maggots to kill them instantly. Vinegar: Use a vinegar spray to deter maggots. Its acidity can help eliminate them. Salt: Sprinkling salt on maggots will dehydrate them, leading to their demise. How to Handle a Maggot Infestation If you find maggots in your trash, food, or elsewhere in your home, here’s a simple step-by-step guide to handle them: Remove the source: Locate and remove the decaying material attracting the maggots. Dispose of the maggots: Use a plastic bag to scoop the maggots and seal them tightly before discarding. Clean the area: Thoroughly clean the area where the maggots were found, using hot water and soap or a disinfectant spray. Take preventative measures: Follow the prevention tips above to reduce the chance of future infestations. Conclusion: The Surprising Origin of Maggots Maggots may not be the most pleasant creatures to encounter, but their role in nature is essential. By understanding where maggots come from, you can prevent them from appearing in your home and appreciate their natural role in the cycle of life. Next time you see a maggot, remember that it’s simply doing its job in breaking down the world’s waste. FAQs What do maggots turn into? Maggots eventually turn into adult flies, continuing their life cycle. How long does it take for maggots to become flies?  On average, maggots take 7 to 10 days to reach the adult fly stage, depending on temperature and food availability. Can maggots appear without flies? No, maggots originate from fly eggs. If you see maggots, there were likely flies present at some point. Do maggots carry diseases? While maggots themselves don’t carry diseases, they can be associated with bacteria due to the decaying material they consume.  

Where Do Maggots Come From Read More »

Can fleas live in human hair

Can fleas live in human hair

Introduction Fleas are tiny critters that can turn your nice and peaceful household into a fest of itching and scratching. Despite their small size, they pack a punch when it comes to disrupting the comfort of both you and your pets. These absolute nightmare creatures often hitch a ride on your pet’s fur, but what if they make their way into your locks?While it’s rare, it’s not impossible for fleas to find their way into human hair. Though they don’t thrive there as they do on your pets, they can still cause a great deal of discomfort. The good news is that you can take steps to rid your hair of these pests for good. With the right approach, you can restore the peace in your home and keep those fleas from turning your life upside down. Where can fleas live Fleas are incredibly adaptable creatures that can thrive in many different environments. While they are often an issue for furry pets like cats and dogs, they aren’t too picky about where they settle. These pests can be found lurking in carpets, bedding, and upholstery, as well as in outdoor areas around your home. Flea eggs, larvae, and pupae can even hide in the cracks and crevices of your house, especially in darker areas where they feel safe Getting rid of a flea infestation can be a real challenge, as these pests favour the hidden spots in our homes. But don’t worry, with a bit of persistence, you can completely eradicate them and stop the itch for good. Fleas In Human Hair: Treatments And Home Remedie Fleas are a common risk for anyone with pets, and finding them in human hair can be especially worrying. These tiny pests feed on the blood of their hosts and typically infest animals like cats and dogs, but they can also bite humans. While fleas may not survive long in human hair, they can still cause allergies and transmit diseases. To get rid of these pests, it’s important to focus on both prevention and treatment. The prevention of a flea infestation in human hair begins with proper care of your pets. Fleas live in the furs of animals, using them as vectors to reach other hosts. If you notice any signs of fleas on your pets, such as excessive scratching or visible flea dirt, it’s crucial to act promptly. Treat your pets with effective flea control measures like the ones used for Cat fleas (Ctenocephalides felis) and Dog fleas (Ctenocephalides canis), which are commonly found on cats and dogs.For humans, fleas are generally more of a temporary problem. The short answer is that while fleas can jump onto human hair, they don’t breed there due to the lack of warmth and density they need. If you do find a flea in your hair, stick to simple steps like washing your hair thoroughly and using a fine-tooth comb to rid your hair of any lingering pests. With the right approach, you can say bye to fleas and keep them from becoming a persistent issue. How Do You Know If You Have Been Infected By Fleas? If you start feeling intense scalp itching or notice red welts, bumps, or even pus-filled blisters on your neck or scalp, these could be symptoms of flea bites. Some individuals who are allergic to flea saliva might also experience severe irritation and redness, often leading to scalp inflammation. If these symptoms persist for more than 3 days, it’s essential to consult a doctor or a dermatology expert. It can be difficult to distinguish between human and animal fleas without the proper tools, like a microscope, or the necessary knowledge of their anatomy. If you find darkish red fleas that are typically found on animals around your home, it might indicate that someone who owns a pet has been nearby. These fleas can jump up to two feet, which means they could be on your furniture, carpets, or even in your hair. Humans generally get a different type of flea, which is smaller and white, with their eggs or nits that attach to a single hair strand. To treat this problem, you can use special types of shampoos available in any grocery store with a first aid department. These shampoos are designed to rid your hair of fleas and prevent further infestation. Always be cautious and keep an eye out for the symptoms mentioned above to address the issue quickly and effectively. How To Treat Fleas In Human Hair? Treating fleas in human hair requires a careful approach to ensure complete removal. Start by using a shampoo that specifically washes out fleas from the roots of your hair. Gently massage the shampoo into your scalp and wait for about 2 to 3 minutes to let the active ingredients work. After that, use a wide-tooth comb or your fingers to remove any remaining fleas. This helps in getting rid of both the fleas and any eggs that might be present. For a more natural approach, you can try Tea Tree Oil or Apple Cider Vinegar. Adding a few drops of tea tree essential oil to your shampoo can help curb a flea infestation. This oil is traditionally used and research suggests it is effective in managing fleas. Alternatively, mix Apple Cider Vinegar with water in a 1:1 ratio and spritz it on your hair. Leave it for 15 minutes before rinsing with warm water. This remedy is widely believed to help eliminate fleas and reduce scalp itchiness. Another remedy involves using Baking Soda, a natural and non-toxic option. Simply mix 2 tablespoons of baking soda with 10 ml of water to create a thick paste. Apply this mixture to your scalp and gently massage it with your fingertips. Leave it on for 10 to 15 minutes before rinsing with lukewarm water. Alongside these treatments, it’s important to clean your house thoroughly, including pillows, sheets, and other areas where fleas might survive. This helps prevent any lingering pests from causing a re-infestation.

Can fleas live in human hair Read More »

Uncover the Spiritual Secrets Behind Your Beauty Marks!

What Do Beauty Marks Mean Spiritually? How to Interpret Every Spot Beauty marks, also known as moles, have captivated attention for centuries, from the Roman and Egyptian eras to the modern world. They were once seen as imperfections that people tried to hide, but now they’re celebrated, often linked to spiritual meanings. Many believe that these small spots on the skin carry deeper significance, acting as a symbol of one’s destiny or life path. In certain cultures, moles are thought to be stamps of God’s love and protection, while others view them as markers of reincarnation or a sign of divine guidance. Each location of a beauty mark can give insight into a person’s personality, wisdom, and purpose in life. The Symbolism of Moles on the Body The location of a mole or beauty spot on the body can be incredibly revealing. A forehead mole, for example, is often said to symbolize wisdom and strong spiritual connection, while a mole on the cheek might represent bravery or intelligence. In ancient cultures like Christianity, moles were sometimes viewed as a sign of God’s divine presence and protection. They’re often seen as a gift from the universe, and their meanings can vary greatly depending on their shape or placement. A heart-shaped mole might be connected to love and twin flames, while a star or crescent moon shape could indicate a strong connection to the cosmos. Beauty Marks and Personality Beauty marks or moles not only speak to our physical appearance but also reveal aspects of our soul and personality. In some beliefs, they highlight areas where our soul is still evolving. For instance, a mole on the face might indicate someone with a deeply compassionate nature or someone destined for greatness. These spots continue to shape and develop through multiple lives, suggesting they carry energy from past experiences. In Warren Wiersbe’s view, as expressed in Ralph Waldo Emerson’s essay on Nature, beauty marks reflect something profound—a blend of art and the spiritual state of mind. These marks are seen as part of God’s creation, like a final stroke in the painting of human destiny. Moles as Signs of Past Lives Historically, beauty marks and moles have been considered remnants of past lives. They’re believed to be scars or wounds carried over from a previous incarnation, symbolic of experiences or battles fought. The idea of moles as markers of past reincarnation resonates strongly with people who believe in spiritual growth across lifetimes. These marks might represent where we’ve been in the Universe or show connections to specific tribes and communities from our past. Whether seen as positive or negative connotations, beauty marks are cherished as part of a larger spiritual narrative, teaching us about our destiny and life purpose. Cultural and Historical Perspectives In history, beauty marks have had different meanings depending on where they were found on the body. For instance, in ancient Egyptian and Roman societies, these marks were sometimes viewed as signs of divine favor, while at other times, they were thought to be a place where the devil entered the body. In more modern times, stars like Monroe, Crawford, and Jolie have turned beauty marks into symbols of attractiveness and glamour. Today, they are seen as mystical and sometimes spiritual features, acting as small indicators of luck, prosperity, and protection from the Universe itself. Beauty Mark Meaning by Location Beauty marks are fascinating because they not only enhance one’s appearance but also carry spiritual significance, often believed to reveal personality traits, destiny, or life path. The position of a mark on the body or face can be interpreted in unique ways across different cultures and traditions. Let’s explore what these marks mean based on their location, from the forehead to the back. Forehead A beauty mark on the forehead is often linked to wisdom and indicates that the person is energetic and diligent. Those with a mark on the right side are seen as likely to have a wonderful partner and a successful career. On the left, it’s said to foreshadow bad luck, while a mark in the middle suggests someone who is both wise and insightful. Eyebrow If you have a beauty mark on your eyebrow, it often signals luck and prosperity. People with a right eyebrow mole are thought to enjoy a happy marriage and a balanced family life. A left eyebrow mark can suggest cowardice or difficulties in professional endeavors. Those with a mole in the middle of their brow tend to be clever and can effectively accomplish tasks, making them natural leaders. Eyelid The meaning of a beauty mark on the eyelid can depend entirely on its location. On the left, it may represent arrogance, while a mark on the right eyelid indicates a positive, hardworking person. For women, a mole near the corner of the eye symbolizes success in finding a partner, whereas for men, it could indicate wealth and a flourishing career. Cheek A beauty mark on the cheek is seen as a sign of beauty, bravery, and intellect. Those with a mark on the right cheek are often considered sensitive and family-oriented. However, a mole here might also hint at being a bit introverted or prone to arrogance. People with a cheek mole tend to work hard to achieve their goals independently. Nose A beauty mark on the nose is a sign of high self-respect and a strong work ethic. Such individuals usually make friends easily, but they may struggle with making decisions or managing their impulses. A mole on the right side represents passion and an increased craving for intimacy, while a mark on the left could predict economic or health-related struggles. Lip Marks on the lip have significant spiritual meanings. A mole near the corner of the lips represents a taste for the finer things in life, while a lower lip mole might indicate a person who loves food, theater, and acting. A mole on the upper lip, meanwhile, signifies someone who is warm and empathetic. Chin A mole

Uncover the Spiritual Secrets Behind Your Beauty Marks! Read More »

yoga teacher

How Yoga Teacher Training Can Enhance Your Personal Practice

Following a yoga teacher preparing is a choice that can transform you in numerous ways. Many individuals decide to do teacher preparation after acknowledging they need to change their vocation or jump further into yoga. A large portion of the time, a 300 hour yoga teacher training in rishikesh as yoga instructor preparing will influence your life a long way above and beyond, as it will ignite a continuous course of self-improvement. How Did Your Yoga Teacher Preparing Completely Change You? Here are the best 10 different ways that a yoga teacher preparing can completely change you and has changed a large number of our alumni’s lives: 1. Investigating New Profession Choices Whether it is beginning a profession as a yoga instructor or something different that comes from your heart, teacher preparation allows you to ponder how you have managed your life up until this point and the main thing to you. Taking a gander at your life in a good way permits you to pursue careful decisions about your way of life and vocation. The vast majority spend a lot of their time at work as a 300 hour yoga ttc in bali. Hence you should contemplate and acknowledge what sort of work satisfies you. The way that you concluded to do the teacher preparing implies you as of now dare to roll out significant improvements. 2. Making Way of Life Changes Because of the profoundly organized program at the ashram, you are prepared to adhere to everyday practice. You get up at fixed times and head to sleep early. The food you eat is sound and nutritious. Also, you practice yoga asanas consistently. Adhering to this way of life for an entire month is extremely strong and assists with growing new propensities. What’s more, there is no place for interruption. So in the long run, this likewise assists you with ending old and pointless propensities. Yin yoga training rishikesh essentially can’t drink espresso consistently, get your telephone constantly, or rest past the point of no return or excessively lengthy. What’s more, that is such a freeing experience that you will probably stay with it back home (or if nothing else attempt it). 3. Embracing Straightforwardness One more constructive outcome of carrying on with the ashram life is that you’re returning to rudiments. Life at the ashram is straightforward and trained. Dozing in a basic room, eating the food that is given, no web association. As such: there is just what you really want. Working on your routine is a strong method for rehearsing satisfaction – being content with what you have without wanting all the more constantly. This yoga teacher training in rishikesh can be a significant change as far as you can tell of life after the teacher is preparing. Regardless of whether there’s not a major contrast in that frame of mind, there will be an urgent change in your approach to encountering, thinking, and acting. 4. impacting Your Point of view on Life Before going to a yoga teacher, many individuals consider yoga a method for reinforcing their body and purging or loosening up their brain. This is all consistent to some degree, however, it’s not the total image of yoga. A best yoga teacher training rishikesh as a yoga teacher’s preparation gives you a top-to-bottom comprehension of yoga reasoning. Besides, explicit ideas, for example, karma yoga assists you with grasping human life according to an alternate point of view. It provides you with another case of reference for your background. This widens your psyche and gives you new experiences that you can move to other people. 5. Expanding Actual Strength and Adaptability At the point when you practice yoga asanas no less than two times every day, you will see very astonishing actual outcomes. Yoga practice advances muscle strength, adaptability, and endurance, as well as working on working on the inward organs. Not only will you find out about the constructive outcomes of every asana in more detail during the preparation, but you will also encounter these impacts yourself. 6. Encountering Mental Development Through the difficulties of living at the ashram, detached from your recognizable environmental elements, it isn’t business as usual that many individuals experience huge individual and mental development. The meditation teacher training rishikesh at the ashram can assist you with tenderly growing your limits and trusting in yourself. For instance, who might have accepted that everyone could do and hold a headstand for a couple of moments toward about a month’s end? These encounters cause you to acknowledge you are frequently more grounded than you naturally suspect, and that is an illustration you will take with you until the end of your life. 7. Interfacing with Yourself As well as everything above, rehearsing yoga seriously all through your teacher’s preparation permits you to reach out with yourself. Rehearsing reflection, pranayama, and yoga asana consistently increments mindfulness as well as internal equilibrium. Beginning every morning with reflection advances concentration and clearness to you, going past programmed speculation designs. Joined with additional otherworldly practices and self-study, this helps you to reconnect with who you truly are. 8. Acquiring Certainty to Instruct and Supporting Self-assurance The program of the Arhanta yoga teacher certification rishikesh as instructor instructional class offers you the chance to develop continuously and normally into the job of a yoga teacher. The day-to-day classes on showing methods and showing rehearsals from the primary week forward permit you to further develop your instructing abilities. Besides, the hypothetical classes give you a firm comprehension of the point of yoga. The entire course is intended to set you up to show yoga expertly with certainty and expertise. 9. Feeling More Unassuming and Committed to Your Yoga Way As there is such a long way to go, a yoga instructor preparing is an extremely lowering encounter. You understand the amount more you need to learn and that you are right toward the start of a long-lasting interaction. Even though you will have much more

How Yoga Teacher Training Can Enhance Your Personal Practice Read More »